Firmware Updater Manual#
For Alvium, Goldeye, and Goldeye Pro cameras.
Vimba X Firmware Updater supports firmware uploads to Alvium, Goldeye, and Goldeye Pro cameras. You can update several cameras in one step. Uploading older firmware to the camera is also possible. If you prefer to upload firmware via command line, see Command line Firmware Updater.
On Windows and Linux, Vimba X Firmware Updater is available in the Vimba X install directory/bin.
See also
Uploading firmware#
To upload new firmware to your cameras, perform the following steps:
Connect your Allied Vision cameras and start Vimba X Firmware Updater.
Click Open and select a firmware container file. Optional: Click Info to get details about the selected firmware. To select the new firmware manually, go to the New firmware drop-down list.
In the New firmware drop-down list, select the firmware you want to upload.
Click Update cameras to upload the selected firmware to your cameras.
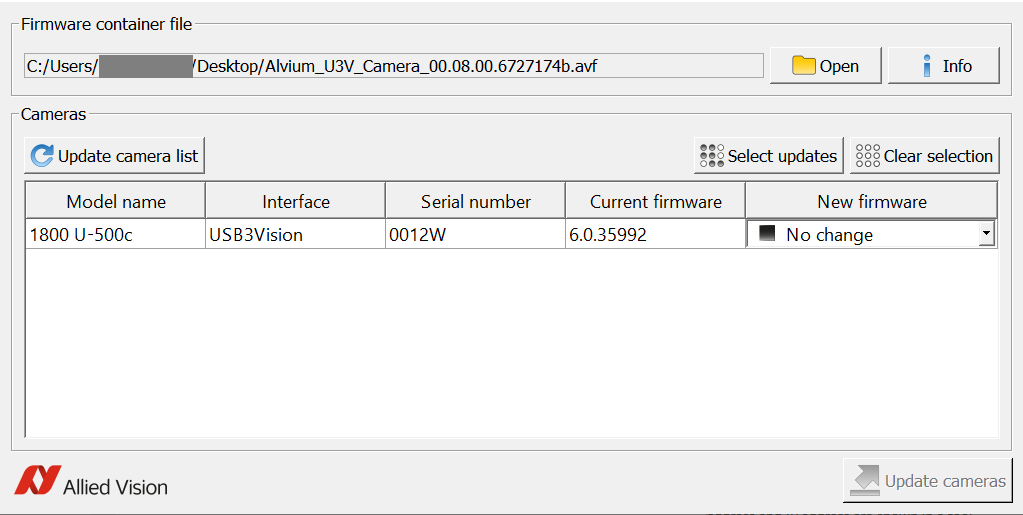
Firmware Updater#
If the firmware has a lower version number, Vimba X Firmware Updater interprets this as a older version.

Select firmware#
Aborting a firmware upload#
The firmware upload to several cameras takes some time. During the upload, Abort finishes the upload to the current camera, but does not upload firmware to the next models.
Troubleshooting#
If your camera is not detected or the firmware cannot be updated:
Make sure no other application uses the camera.
Check if the camera works with Vimba X Viewer.
Reboot the system.
Start the firmware upload again. If it does not work, start the command line Firmware Updater (VimbaXFirmwareUpdaterConsole.exe) and use repair mode or contact our support team: https://www.alliedvision.com/en/company/contact-us/technical-support-and-repair-rma
Windows only: with USB cameras, start Vimba X Driver Installer and make sure the Vimba USB driver is in use.
If you connected your USB camera to a hub, unplug the hub from the PC and disconnect its power supply. Reconnect it and try again.
Connect your USB camera to a different USB 3.0 input or a different hub.
Command line Firmware Updater#
On Windows and Linux, Vimba X Firmware Updater Console is available in the Vimba X install directory/bin.
To update firmware via command line, use FWUpdaterConsole.exe. This tool provides two main functionalities:
--showor-sdisplays information about camera firmware or a firmware file.--writeor-wperforms the actual update.
See the following list of use cases:
Use case |
Parameters |
|---|---|
Show device info for list of cameras |
--show --device “list of ids” |
Show a list of matching firmware sets |
--show --container “file” --device all |
Show detailed info about matching |
--show --container “file” --device “id” |
Show firmware set info for one set |
--show --container “file” --index “index” |
Show firmware set info for list of sets |
--show --container “file” --index |
Show firmware set info for whole container |
--show --container “file” |
Write one firmware set to one camera |
--write --container “file” --device |
Write ‘best’ (latest) firmware set to list |
--write --container “file” --device |
Write ‘best’ (latest) firmware set to |
--write --container “file” --device all |
Write one firmware set to one camera |
--write --repair --container “file” |
The following options may be added to the “show” or “ the “write” functionality:
Option |
Parameters |
Show full information |
--verbose, -v |
Force writing |
--force, -f |
Repair device firmware during write |
--repair, -r |
Tip
By calling FWUpdaterConsole --help [command/option], you get more details
about the tool or its parameters.